Photoshop Tutorials, Flash Tutorials, 3Ds Studio Max Tutorials, Web Design Tutorials |
Home | Submit Tutorial | Top Sites | Free Templates (NEW) | Website templates | Privacy Policy | Link Exchange | Contact Us |
|
Welcome To ProDesignHost.com 3D Graphics Tutorials Area - Adjusting Camera & Light - Software: LightWave 3D3D Graphics Tutorial - Adjusting Camera Light
Since we already have the objects loaded into Layout, we can now start adjusting
the scene of how we want the final render to look (If you don't have the objects
loaded, click the "Items" Tab at the top of Layout, select "Add -> Load
Object", then browse to where you saved it and load it in). First of all we will
place the camera to the correct position. Click to select the "Camera" Item at
the bottom of Layout, then change the view of the Universe to "Camera View". You
should now view everything from the Cameras point of view, like in picture 36.

Picture 36: What the Camera sees (Click to
enlarge) Adjusting the Camera When you have the Camera Item selected, activate the "Move" Tool in the Toolbar to the left. Now edit the Position window at the bottom left of Layout and use the following settings. 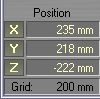
Picture 37: The Cameras Position
When you have entered all three values, hit "Enter" on your keyboard to create a keyframe for the camera. This will make Lightwave remember that we moved the camera to this position. Once you hit Enter you should be represented with a window, just accept the default values and click OK here. Hint, clicking Enter twice in a row is a fast way to create a keyframe on the current frame you're on. Now it's time to rotate the camera. Select the "Rotate" Tool to the left of Layout, and then use the following settings in the Rotation window at the bottom left of Layout. 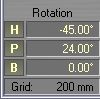
Picture 38: The Cameras Rotation
This will rotate the Camera; hit "Enter" again to create a keyframe, so that Lightwave will remember the Rotation we just made. Finally open up the Properties Panel for the Camera and change the Zoom Factor to 2.5, this will make the camera seem more focused on the bowl. Adjusting the Light Activate the "Lights" Item at the bottom of Layout, then hit "p" and the Properties Panel should come up. Use the following settings for the light. 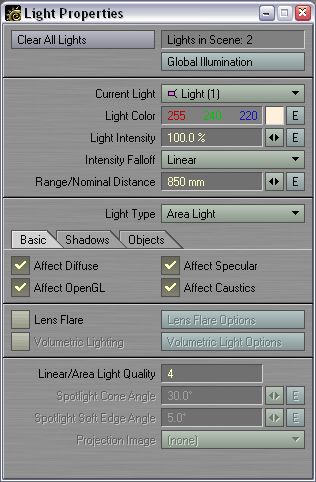
Picture 39: The Light Properties
Note! You have to change the Light Type into an Area Light before you can apply the Intensity Falloff. Once you entered all the settings, click the "Global Illumination" button, and use the following settings in the Panel that comes up. 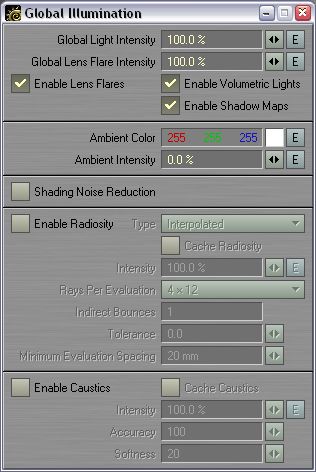
Picture 40: The Global Illumination settings
Once you've entered the values, you can hit "p" twice to close down both this Panel and the Light Properties Panel. Now change the view of the Universe to "Light View", so that we see things from the Lights point of view, it's time to move, rotate and scale the Light. Keep the "Lights" Item selected and activate the "Move" Tool. Use the following settings in the Position window. 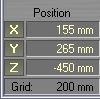
Picture 41: The Lights Position Next activate the "Rotate" Tool and use the following settings in the rotate window. 
Picture 42: The Lights Rotation To make the light throw light at closer range, we also need to scale/size it down. Activate the "Size" Tool and use the following settings in the Scale window. 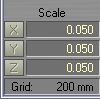
Picture 43: The Lights Scaling Once you changed all the values, create a keyframe. Since we are viewing things from the Lights point of view, the Universe should now look something like picture 44. 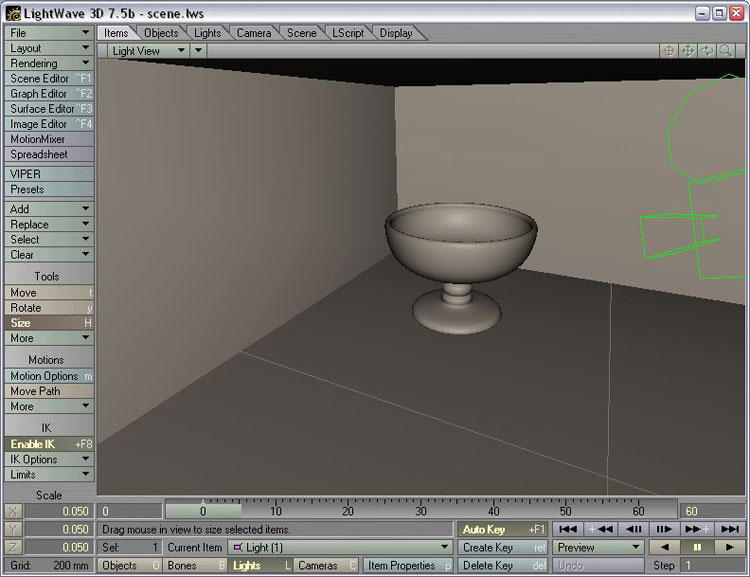
Picture 44: Viewing from the Lights point of view
(Click to enlarge) We are going to clone the Area Light that we have to give the scene a bit more softer light. Select the Light as current Item and then select "Add -> Clone Current Item". A question will pop up asking you how many clones, so just enter 1 and click OK. We are going to change some of the properties for this light, so with the new light selected, press "p" to bring up the properties panel again. Use the settings shown in picture 45. 
Picture 45: The properties for the second light
When you're done with the basic settings, click the "Shadows" Tab within the Properties Panel and set Shadow Type to OFF here, we don't want this light to cast shadows. Time to move and rotate this light, use the following values when you Position and Rotate the Light. 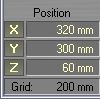
Picture 46: The Lights Position 
Picture 47: The Lights Rotation The Size is already set to the correct value, since we cloned the first light. Once you've moved and rotated the light, create a keyframe save the changes. Now we're pretty much done with setting this scene up, all we need now are some materials for those objects. If we change the view of the universe to Top now, this is what the scene looks like. 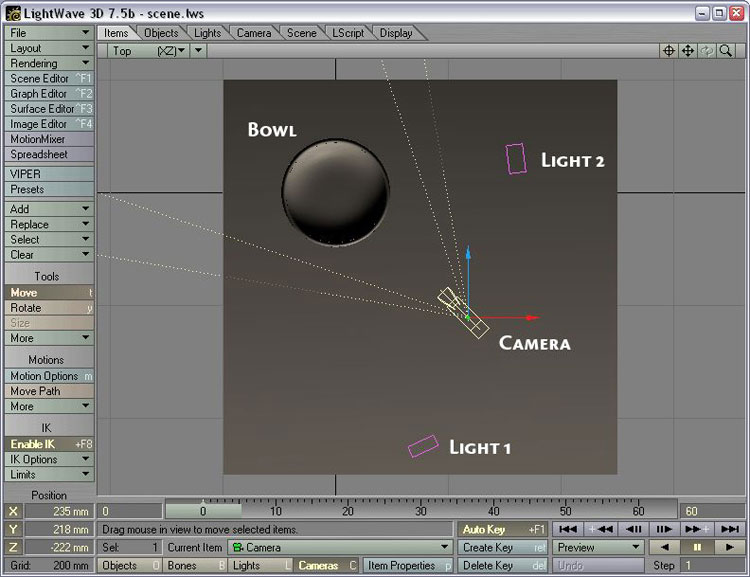
Picture 48: The scene is done, viewed from Top
(Click to enlarge) Change back to Camera View once you're done. Lets try a test render to see what it looks like so far. Open up the Camera Properties and set the Resolution to 800x600. At the top left of Layout you'll see a Rendering Pull-down menu. Click this and select Render Options, then use the following settings. 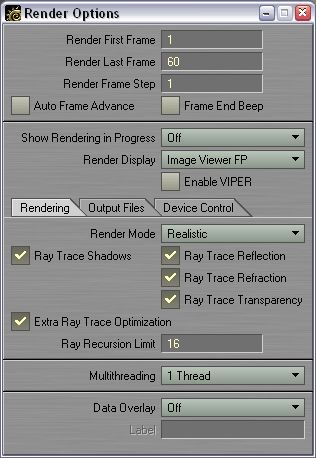
Picture 49: The Render Options At this moment we don't really need Trace Reflection, Refraction and Transparency, but since we're creating a glass bowl we've got these settings set already. So close down the Render Options Panel and press F9 on your keyboard and let it render! Picture 50 is my test render result. 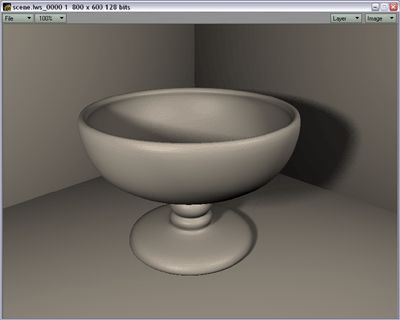
Picture 50: The first test render So lets get on with those materials. Open up the Surface Editor, select the Floor Surface and use the following Basic settings. 
Picture 51: Floor Surface Basic settings (Click to
enlarge) We are going to add a fractal pattern to this surface, so click the "T" for the Diffuse Channel and use the following settings. 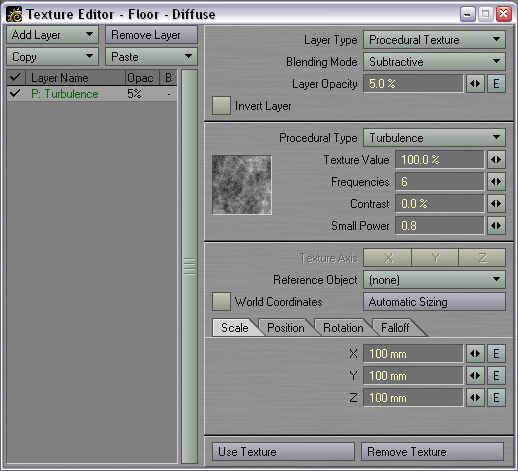
Picture 52: A Procedural texture for the Diffuse
Channel (Click to enlarge) Now since we're using 5% for Layer Opacity here, it won't be strong at all. Click Use Texture once you're done, and that's it for the Floor Surface. Next is the Glass Surface, so select it from the list and use the following Basic settings. 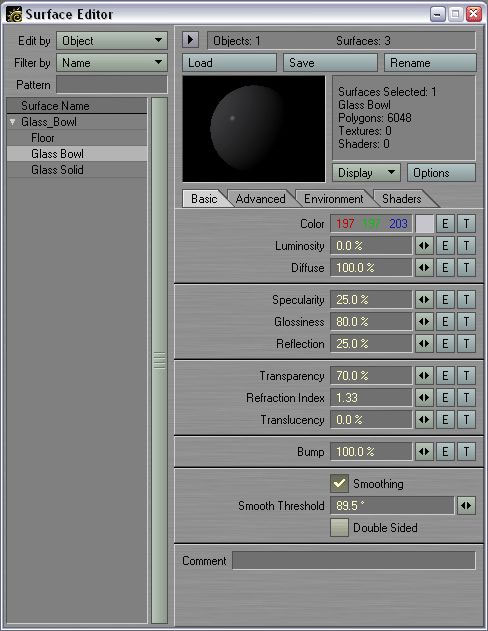
Picture 53: The Basic settings for the Glass Surface
(Click to enlarge) We are going to add two procedural textures for this surface, so click the T for the Transparency Channel and use the following settings. 
Picture 54: The Transparency procedural texture
(Click to enlarge) This will add some variation to the transparency, but a very subtle one since the Opacity is set to 5%. Click Use Texture once you're done. Lets add some bump to, click the T for the Bump Channel and use the following settings. 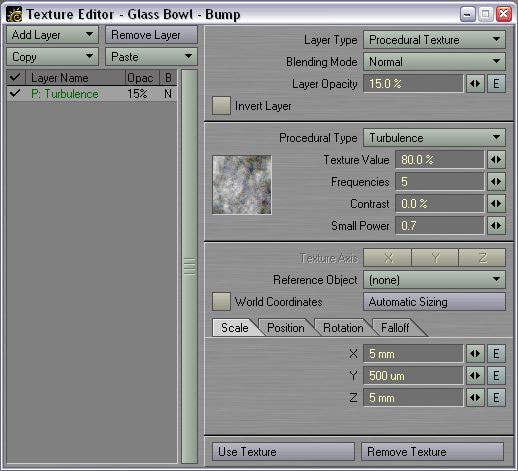
Picture 55: A Bump texture (Click to
enlarge) Just click Use Texture when you're done to save these changes. That's pretty much it for the Glass Surface and now we only have one surface left, the Glass Solid one. This will be quite easy, because we're just going to copy the Glass Surface, paste it to the Glass Solid one and just change it around a bit. Keep the Glass Surface selected and double-click the 3D preview of the texture, this will copy the texture to the Presets Panel. If you look in the Presets now, you should have the Glass Bowl Surface under the Workspace Category. Now switch to the Glass Solid surface in the Surface Editor, then double-click the Glass surface in the Presets Panel to load it in. We are going to keep the two texture channels, so just change some of the Basic settings to the following. 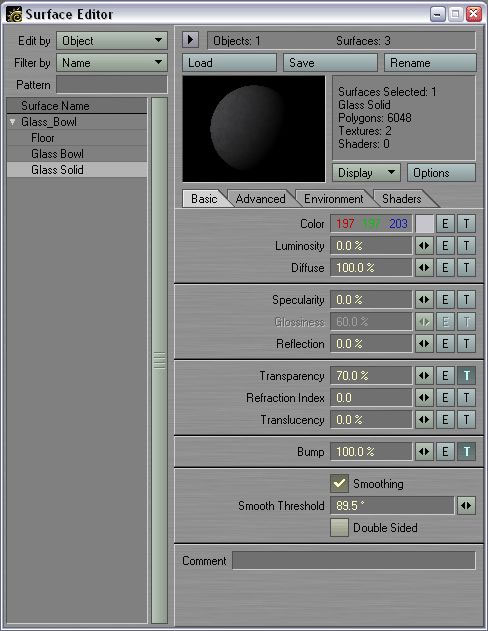
Picture 56: The Glass Solid basic settings (Click to
enlarge) Well that's it for the surfacing part! Looking through the Cameras eyes, the scene should now look something like picture 57. 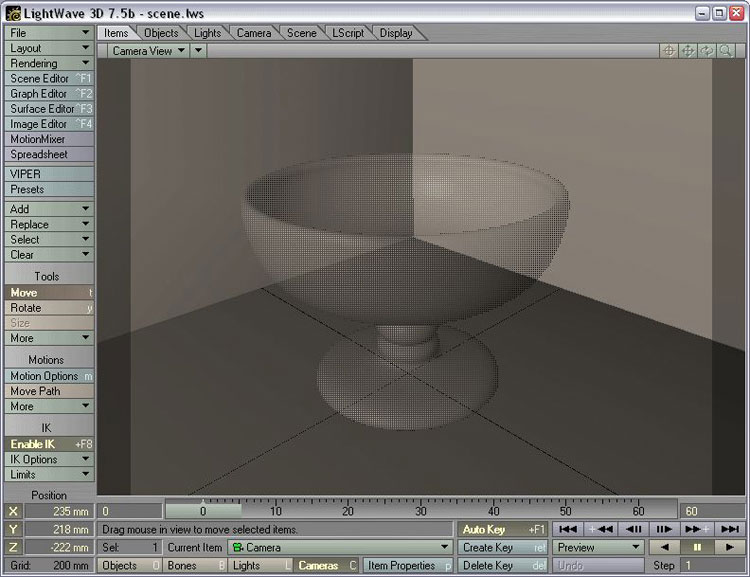
Picture 57: The finished scene (Click to
enlarge) Now, click the "File" pull-down menu button at the top left of Layout. We are going to save both the objects and the scene, so first select "Save -> Save All Objects", and then select "Save -> Save Scene". Choose a place and a name for the scene file. Now all we need to do is render this image. Open up the Camera Properties once more, this time change the Antialiasing level to Enhanced Medium, then close the Panel down. In the Render Options Panel, click the "Output Files" Tab and then click the Save RGB Button. Choose a name and a location for the finished render and click OK. Also make sure you change the Filetype for the output image, I set mine to JPG. Once done just close down the Render Options Panel and once again save the scene file, then press F10 to render the image! I hope the result of the render was satisfying and above all I hope that you learned something from this Guide and Tutorial. The Final Result can be seen below: 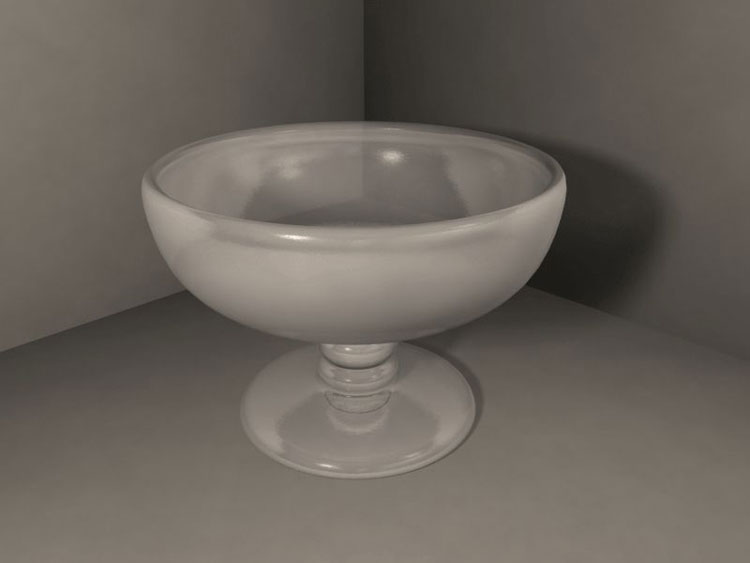
Click to enlarge Download this Tutorial as PDF Document Author: Erik Brimstedt |
|
| Premium Partners | |||||
Free website templates and paid web templates are great tools to make your websites look perfect! You will save time and money with our flash templates and free website templates
Our visitors are satisfied with the quality of our free and paid website templates! Please visit our free website templates and paid website templates sections. We offer free web templates, free web layouts, free web page templates and other stuff for free download. All templates come with the html and external css file so you may easily edit HTML with your favorite HTML editor. Feel free to download our free web templates for your personal websites. Terms of use depend upon the website template vendor. |
Home | Submit Tutorial | Top Sites | Free Templates | Website templates | Privacy Policy | Contact Us |