Photoshop Tutorials, Flash Tutorials, 3Ds Studio Max Tutorials, Web Design Tutorials |
Home | Submit Tutorial | Top Sites | Free Templates (NEW) | Website templates | Privacy Policy | Link Exchange | Contact Us |
|
Welcome To ProDesignHost.com 3D Graphics Tutorials Area - Modelling A Head - Software: Cinema 4D3D Graphics Tutorial - Modelling A Head
I havent built
loads of heads so I'm no expert :) and this is not the only way to do
stuff its just the way I did it this time ;-). Its meant as a guide to
give you some ideas on how to get that first head modelled. Its not
fully finished yet and this part only deals with the bulding of the
face, the top/back of the head, neck and ears etc will be added as I
write them, look out for news on my main page!!
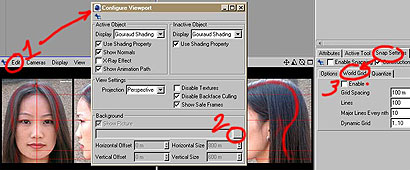
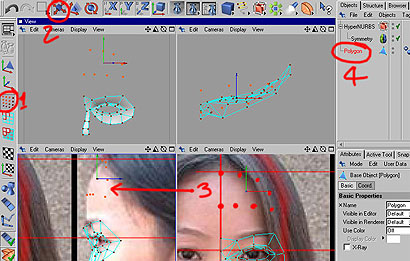
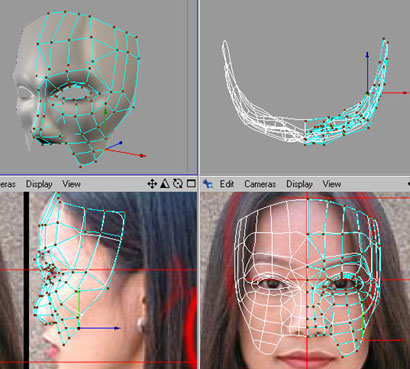
I found some decent head pics on Fineart.sk and in Cinema 4D I clicked 1. EDIT on each viewport and 2. Chose the background pic and set its size the same as the image. 3 Also I click SANP SETTINGS tab and disable WORLD GRID by unticking it!
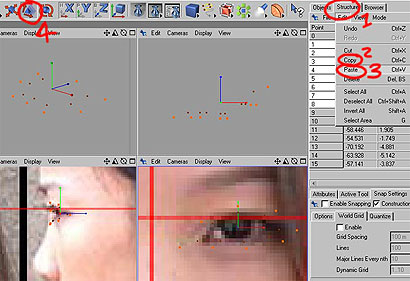
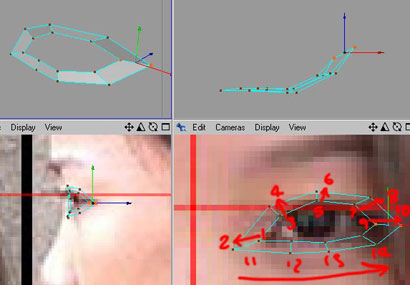
Ok first thing is to add a POLYGON OBJECT the add some points (hold CTRL and click to add points) outlining the eye, I move the points in the side view as well to make them follow the eyelid, then I select all the points 1. click STRUCTURE and 2. COPY and 3. PASTE (copy of selected points) and 4. I SCALE the points up making the outer eyelid, its a quick way of copying points and keeping their shape.
Heres where the BRIDGE tool comes in handy, press "B" and drag 1-2, 3-4,5-6,7-8,9-10 to create all the faces along the top of the eyelid and press ESCAPE to break off face building, then drag 11,12,13,14 to build the bottom faces along the eyelid....
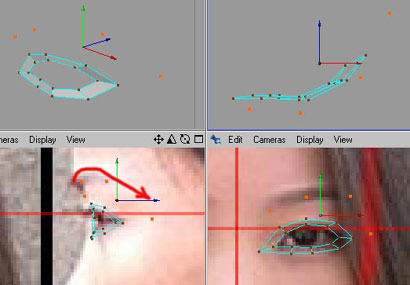
I added 4 more points for the eyebrow in POINT MODE and moved them in each view to fit the reference pic as you can see. Use the BRIDGE tool to build the faces up from the top eyelid edge......
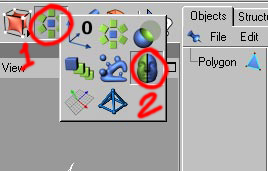
1. Click and 2. Drop in a SYMMETRY object, this will allow me to build one side of the face and automatically mirror and weld the other side....
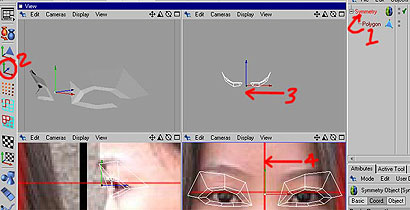
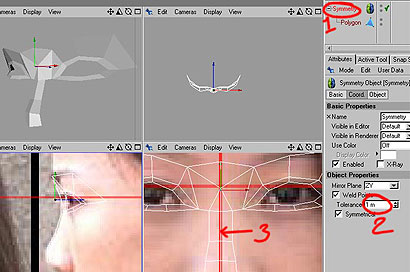
1. Drop the polygon object into the SYMMETRY object and the eyelid will be mirrored, its usually in the wrong place so 2. SELECT the AXIS icon and 3. move the AXIS of the SYMMETRY object to the middle of the face 4. here, this mirrors it perfectly
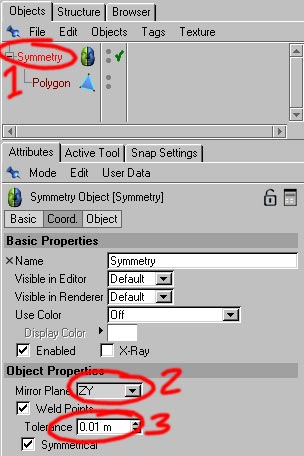
1. Make sure SYMMETRY is selected and if the object is mirroring the wrong way 2. CHANGE this to tell it which plane to mirror the object in, for this ZY works....also 3. This is the tolerance of WELDING the seam down the middle between the two halves.
1. Select SYMMETRY again and 2. The lower the number the closer the points down the middle have to be to snap together and weld, so I set it bigger at 1m instead of 0.01m...3. As you can see all the points down the middle get autowelded.....nice!
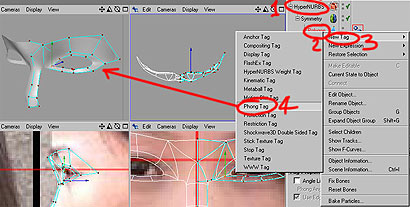
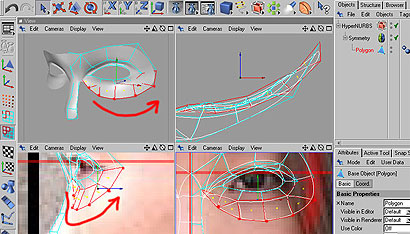
1. I now drop in a HYPERNURBS object and drop the SYMMETRY into that!! 2. RightClick the POLYGON object, 3. Choose NEW TAG and 4. Choose PHONG TAG from the menu, this will smooth the faces....
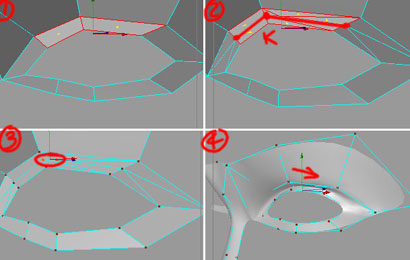
OK I'm constantly dragging the SYMMETRY out of the HYPERNURBS and dropping it back in, this is because the faces are easier to see sometimes when they are not smoothed. 1. I need some more detail in the top eyelid so I Select the faces and 2. I make two cuts using "K" the KNIFE tool, 3. I also weld the points that are close together just to tidy up the mesh, then 4, I move the new points inwards to create a more definate line in the top eyelid....
OK now I added some more points under the eye and moved them in both views to try and follow the reference pic, I built the faces using the good old BRIDGE tool and tweaked the points a little more...I also added some points down the nose and built the faces...
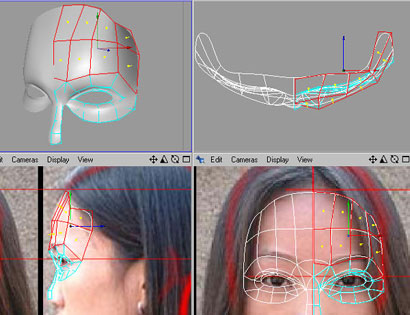
1. POINT MODE, 2. the MOVE tool and 3. I hold CTRL and click to create some more points to build the forehead faces with, as you can see 4. I drag the POLYGON object out of the SYMMETRY to see it in plain flat polys, then drop it back in to smooth it!
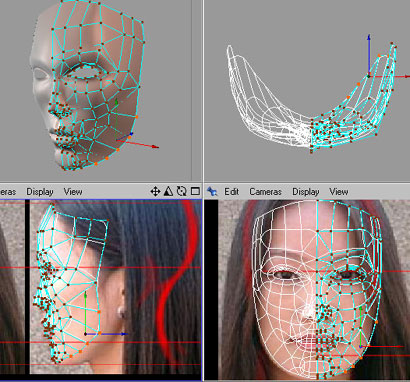
Build the faces for the forehead and its back into POINT mode to push and pull points around, spinning the 3d view, checking in all views and constantly seeing if it looks right...
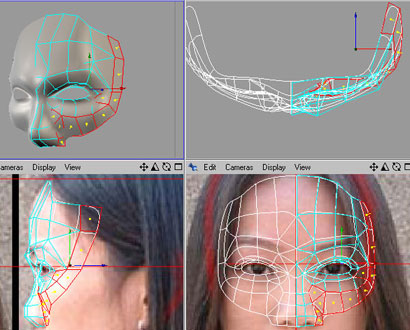
In the left half of this pic it shows 1. The faces above the eyebrow I selected and cut using "K" the KNIFE tool, then I moved the points inwards a bit just to define the eyebrow slightly.....
Added a load of points and built some more faces and generally spent about 10 mins pushing and pulling points again and watching all the views to try and position them correctly
Again more points a few more faces and more pushing and pulling of points in POINT mode.
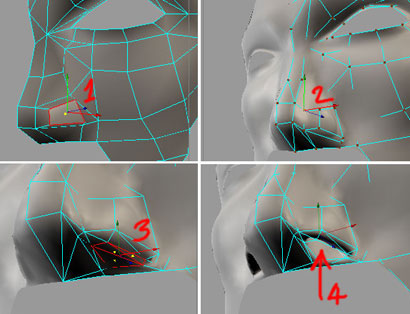
I hate making noses :) anyway this is how I did it this time.....1. select the side of the nostril and EXTRUDE a bit and scale it, 2. POINT mode and lots of tweaking to try and get the shape right, 3.I cut some faces in underneath and tidied it up using weld, then I select the faces that make up the nostril hole and 4. EXTRUDE upwards into the nose to create the nostril.....
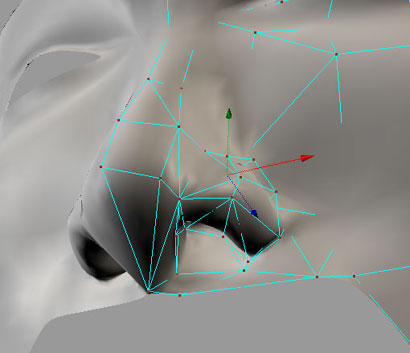
It still needs more tidying up, I made a few more cuts and moved around POINTS to try and get something that looks vaguely like a nose, its hard to explain since its not something I know a lot about, better get sketching and studying I think :)
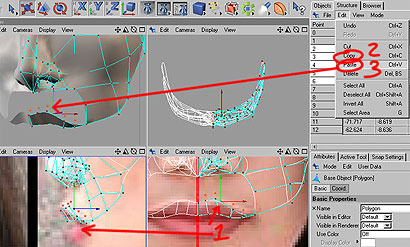
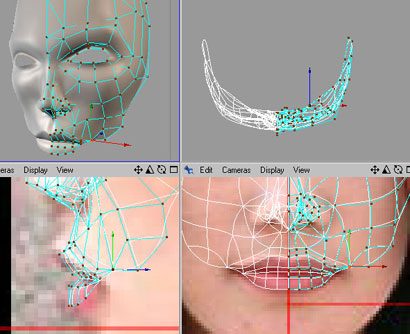
I added some points to create the top lip and I built the faces with the BRIDGE tool and moved the points in both views to match the ref pic, then 1. I selected the points along the top of the toplip and 2. STRUCTURE and COPY, 3. PASTE the new copied points, I move them up and in a bit. I use the BRIDGE to build the faces and the also the faces to attach it to the underside of the nose and cheeks....
As you can see I create faces to join up with the edges of the rest of the face, again a lot more tweaking of points goes on now and all the time and once its finished another hour at least will be spent tweaking points and tidying up to try and get it to look right
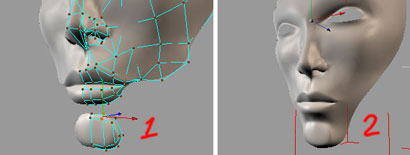
1. I add some more points and build the faces, I move all teh inner points of the chin outwards a bit to give it a bit of depth, and 2. I build some more faces to attach the chin to the mouth/cheeks etc...again more point tweaking as well :)
I add some more points following the chinbone in the side view then I move each one in the front view as well, I build more faces using....guess what?.....the BRIDGE tool
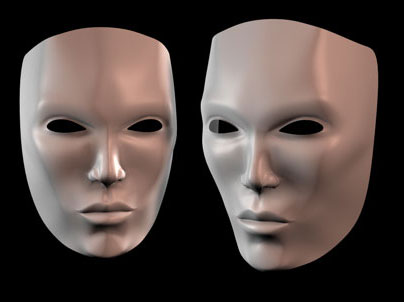
Heres a quick render of it so far, MORE TUTORIAL parts will be added as I write them! I hope you guys out there like this stuff and find it useful, if you do stop by Psionic3d.co.uk and hang out on the forums with the rest of us 3D/4D maniacs ;) Author: Psionic3d.co.uk |
|
| Premium Partners | |||||
Free website templates and paid web templates are great tools to make your websites look perfect! You will save time and money with our flash templates and free website templates
Our visitors are satisfied with the quality of our free and paid website templates! Please visit our free website templates and paid website templates sections. We offer free web templates, free web layouts, free web page templates and other stuff for free download. All templates come with the html and external css file so you may easily edit HTML with your favorite HTML editor. Feel free to download our free web templates for your personal websites. Terms of use depend upon the website template vendor. |
Home | Submit Tutorial | Top Sites | Free Templates | Website templates | Privacy Policy | Contact Us |