 |
Photoshop Tutorials, Flash Tutorials, 3Ds Studio Max Tutorials, Web Design Tutorials |
 |
Home | Submit Tutorial | Top Sites | Free Templates (NEW) | Website templates | Privacy Policy | Link Exchange | Contact Us |
|
Welcome To ProDesignHost.com 3D Graphics Tutorials Area - The Zombie - Modelling - Software: MilkShape 3D3D Graphics Tutorial - The Zombie - Modelling
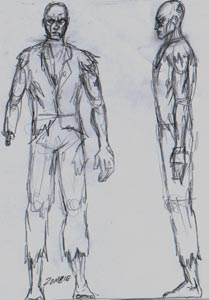 SCAN IN YOUR DRAWINGI usually draw a very rough front and side view keeping them in line with each other, then I scan them in, resize to about 500 pixels high, darken the image so that white vertices and lines show up when working over the top in milkshape. I crop them and save them as Front.jpg and Side.jpg then in milkshape, right click in the front view to bring up the menu, and "Choose background image" using Front.jpg and do the same for the side view (using Side.jpg), you can see what I mean the following pics..... 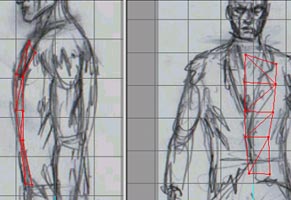 START ADDING VERTSI usually start by creating a load of verts in a strip up the front of the chest, I move them all one by one into position, in the front and side views,then I create faces to join the dots, Check out my other milkshape basics tutorials if you dont know how to do this. As you can see the faces are quite flat across the front of the torso... 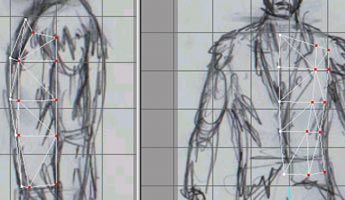 MORE VERTS AND FACESI now add another row of verts and create the faces, I move the verts into position and constantly check how it looks in the 3D view, Mostly in FLAT shaded mode, if you get any faces facing the wrong way you can reverse them as you go along. Its also a good idea NOT to have a black background, that way you can see if any faces are facing inwards etc. 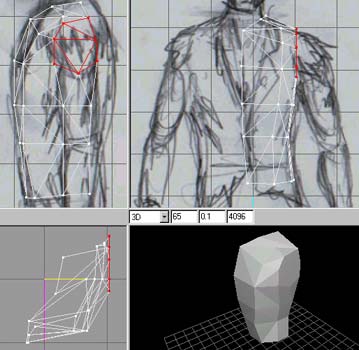 THINK ABOUT STUFFBuilding more faces by adding a few verts at a time and creating faces, I also think about where the shoulder will be extruded from, so I build faces (as shown selected) so that I can later extrude the shoulder/arm etc from it. Sometimes you need to plan ahead :) 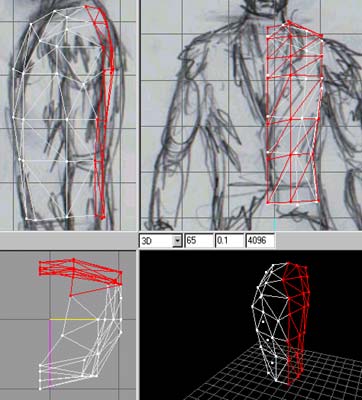 THE BACKI keep adding verts in the side view and building faces, I then move all the verts into position to follow the shape of the back and also down the center line, so that when the model is mirrored the front edge and back edge can be welded. 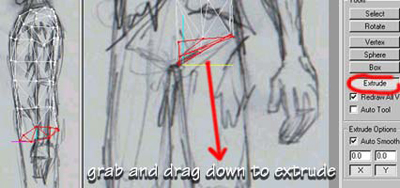 EXTRUDING THE LEGI add verts and create the top of the leg building faces (you need some faces there to extrude from), making sure they are facing downwards by looking from below in the 3D view, then I select all the faces, CLICK extrude and in the front view drag em downwards creating the thigh. 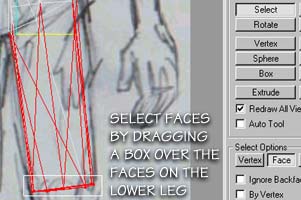 SELECTING END FACESNow lets just say I lost my selection and wanted to select the end faces to extrude the next segments of the leg? Ok, we drag a box and select all the faces we want plus all the others we dont really need, but need to make sure we get all the faces on the end of the thigh. Check the next step..... 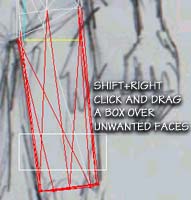 SELECTING END FACES 2Now drag a box as shown while HOLDING SHIFT and the RIGHT MOUSE BUTTON, this will remove unwanted faces from your selection leaving only the end faces selected ready for extruding the next segments of the leg. SHIFT and LEFT CLICK adds to whatever is selected and SHIFT and RIGHT CLICK removes from the selection. 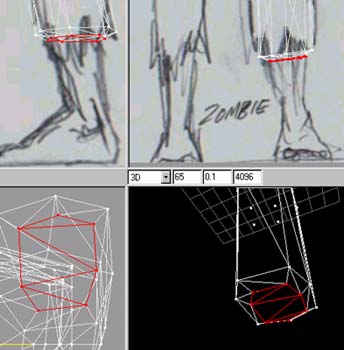 MORE EXTRUDINGI extruded down a few more times scaling it in front and side views to match my reference images and as you can see here I need a step where his torn trousers will end so I extrude a small amount then scale it in from front and side to match the size of the leg.. 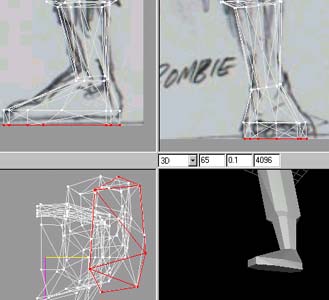 EVEN MORE EXTRUDING....I Extruded again and scaled it to the size of the ankle in the front and side views and moved it into position slightly, I did the same for the foot. When scaling you get three options, Center of Mass, Origin and User Point. Select "User Point" that way whatever is selected scales relative to where your cursor is, try it to see what I mean :) Very very useful 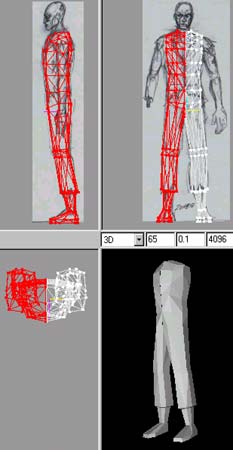 TESTINGI went to Edit-Duplicate selection then Vertex Mirror Left->Right to get a mirrored copy, I moved it across so the center lines were overlapping. Now its time have a real good look over it in the 3D view and turn any edges or tweak verts that aint quite right. Actually I do this many times as I'm modelling just to keep an eye on things! I then Deleted the duplicate and carried on working on just one side. 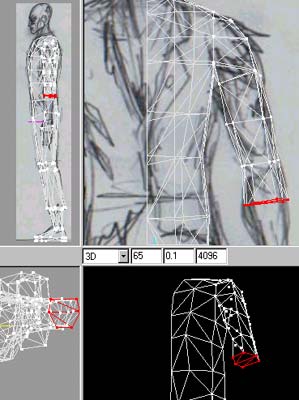 THE ARMSelect the faces that we purposely created in the shape of the shoulder and extrude out horizontally once to create the shoulder, move the verts to follow the shape of the sjoulder in the reference image, Now deselect and eslect the faces that are facing downwards, extrude the arm downwards scaling as you go along following the reference images again. Some faces dont quite look right sometimes so you need to select two faces and use CTRL E or turn edge, please read my milkshape basics for more on this but after a while you'll know which faces need turning (after about your tenth model :)) 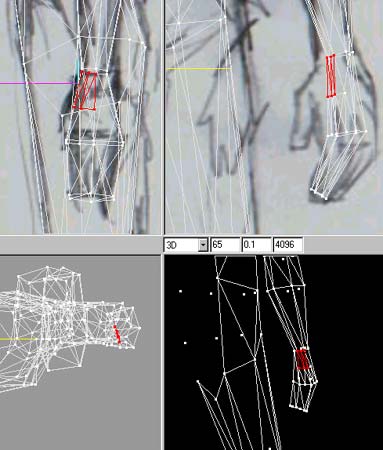 THE HANDI extruded the arm down and carried on to form the basic shape of the hand, I needed some extra faces to extrude the thumb from so I used "Subdivide 4" this divides the selected faces, and it was a BAD IDEA!!!!!! It left me with vertexs in between others etc, I had to search em out and snap and weld them to other existing verts, took me a while, so my TIP is plan ahead like I mentioned earlier, I should have extruded just one more time and I would have had the faces I needed to extrude the thumb But this is how I learn, the hard way :). 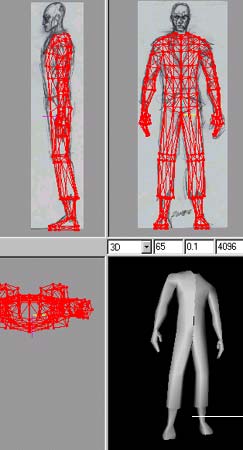 TESTING AGAINI duplicated and mirrored again to see how things where looking, put it in Smooth shade mode, looked over it tweaked things, put it in Wireframe mode and looked over it tweaked things, put it in Flat mode and looked over it tweaked things from all angles. when I say tweaked I mean moved vertexs into better positions, turning edges that dont look right and generally making sure it looks OK from all angles. Then its time for the head!! Delete the duplicate and make a start on the head...... 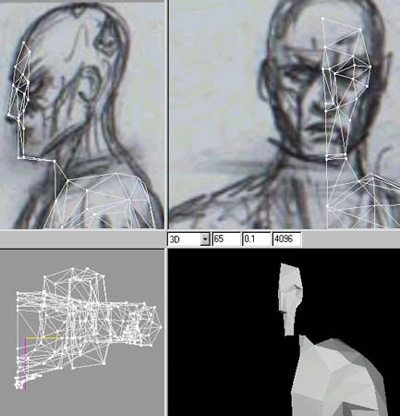 THE FACENow for the fun part!!! I add some verts basically forming the flat-ish front of the face, I move them into position using the side view as well to follow the lines of the face, then I build the faces. Basically just like building the torso, add a strip of verts, move em into position and build the faces. As you can see I place verts where changes in the faces that make up THE FACE will occur...Get what I mean? :) 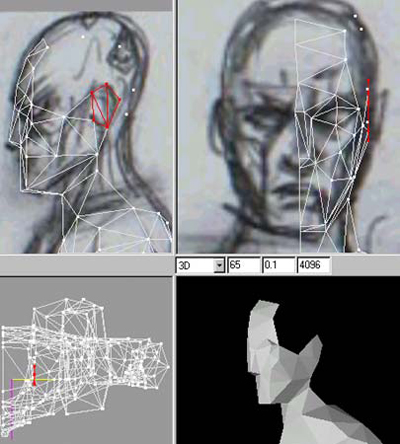 THE HEAD AND EARNow I started adding some verts to the side of the head and moving them into position using the front view, As you can see I built faces for where I intend to extrude the ear from later (Selected in RED) Other than that its a case of adding verts, building faces and constantly checking in the 3D view (FLAT shade mode) if any edges need turning. 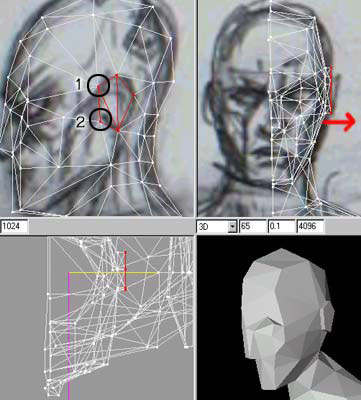 THE EARI added more verts and built faces for the back of the head. I then Selected the faces for the ear and extruded it out once, I dragged a box around the two verts marked "1"selecting them then I Snap 'N' Welded em using CTLR N and CTLR W, I did the same for the two verts marked "2" This brings the front edges of the ear in flush with the head instead of sticking out like a block (see the picture after the next one) SELECTING THE CENTER VERTSI am satisfied with it now So I duplicate and mirror and move the duplicate so that its center line is touching the the originals center line. I select ALL and Regroup them into one mesh in the groups tab. Then from the TOP view I dragged a thin box over all the center verts selecting them, then I used CTRL I to invert the selection and CTRL H to hide the selection, this leaves me with just the center verts visible. Even though it only looks like theres one vertex at each point there is two, one from each half of the model, so in the next step we will weld them together to get rid of the seem. SNAP AND WELD THE SEEMI start by selecting the verts on the chin for example (So I remember where I started from) I use the side view and drag a small selection box around the vertex (well two verts really) in the chin, I use CTLR N and CTLR W to snap and weld, then I select the vert under the nose and Snap and weld and so on and son on, all the way around the center line and if you set the 3D view to Smooth shading you can see the seem being closed as you go along. Thats it really, easy wasn't it? The next tutorial will be about grouping and UV mapping using Lithunwrap!! Hope you found this useful. Author: www.psionic3d.co.uk |
|
| Premium Partners | |||||
Free website templates and paid web templates are great tools to make your websites look perfect! You will save time and money with our flash templates and free website templates
Our visitors are satisfied with the quality of our free and paid website templates! Please visit our free website templates and paid website templates sections. We offer free web templates, free web layouts, free web page templates and other stuff for free download. All templates come with the html and external css file so you may easily edit HTML with your favorite HTML editor. Feel free to download our free web templates for your personal websites. Terms of use depend upon the website template vendor. |
Home | Submit Tutorial | Top Sites | Free Templates | Website templates | Privacy Policy | Contact Us |