Photoshop Tutorials, Flash Tutorials, 3Ds Studio Max Tutorials, Web Design Tutorials |
Home | Submit Tutorial | Top Sites | Free Templates (NEW) | Website templates | Privacy Policy | Link Exchange | Contact Us |
|
Welcome To ProDesignHost.com 3D Graphics Tutorials Area - Uv Unwrapping And Painting A Gun In Bodypaint - Software: Cinema 4D3D Graphics Tutorial - Uv Unwrapping And Painting A Gun In Bodypaint
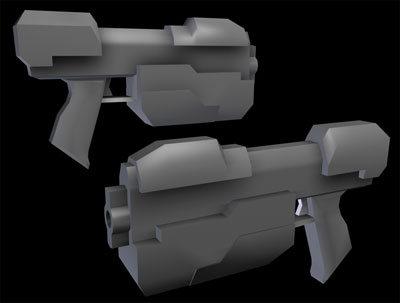
 Heres the REFERENCE PIC of the gun in case you want it!
This first part of the tutorial is going to deal with a quick efficient way to UV map a weapon in BODYPAINT, it may seem a bit daunting at first but after while you'll rip a gun to bits in 15 minutes!! The concept behind it is to seperate each group into front,back, sides, top and bottom then lay them out efficiently and finally paint the skin itself, wanna know more? read on...
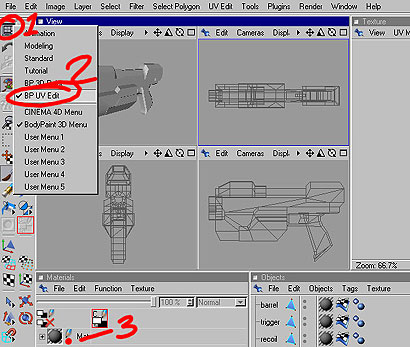
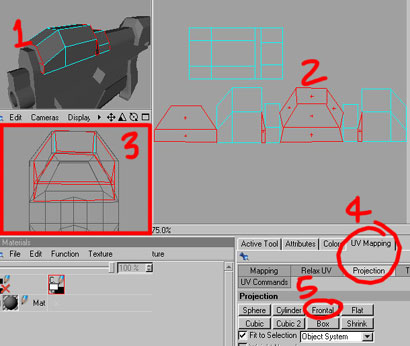
1. First off make your model, and as you can see here its in several groups because it will later be animated for in-game use, recoil and reloading etc, 1. Click the Layouts button 2. and Choose BP UV EDIT to go into UV EDIT mode....and 3. Click here if there is already a texture there to enable painting on it, if not I'll be showing you how to create a new texture later...
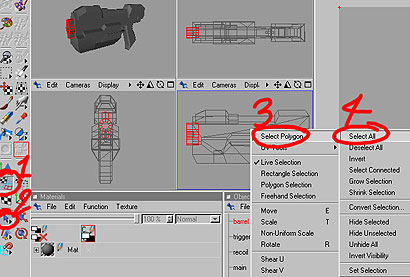
OK we are gonna start with the barrel so select it and 1. Click here to go into FACE MODE, 2. then choose the SELECT TOOL, 3. RIGHT CLICK and choose SELECT POLYGON and 4. SELECT ALL and this will select all the polys in the barrel group
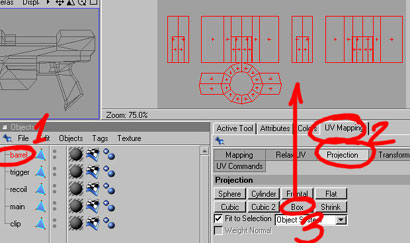
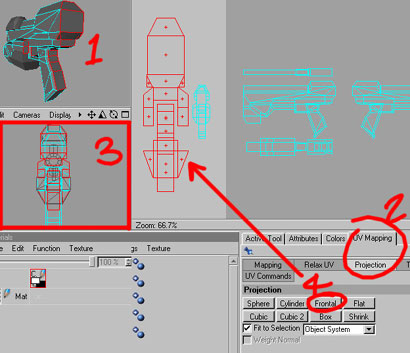
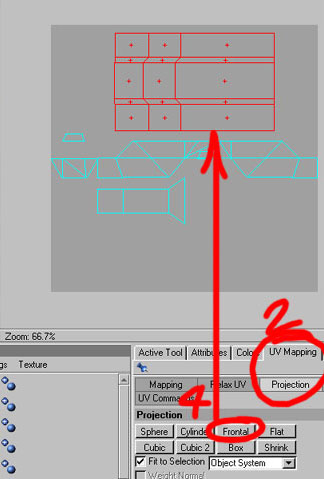
1. Make sure the barrel is selected and 2. Click the UV MAPPING tab and PROJECTION and choose BOX mapping and as you can see its box mapped the barrel!!
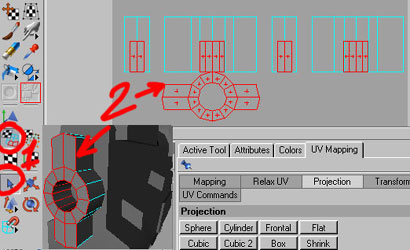
1. Still in UV mode and using the SELECTION TOOL and SHIFT to ADD to what faces are selected and CTRL to MINUS from the currently selected faces, 2. We select all the end faces of the barrel and the inner faces because they are all gonna be mapped from the front.
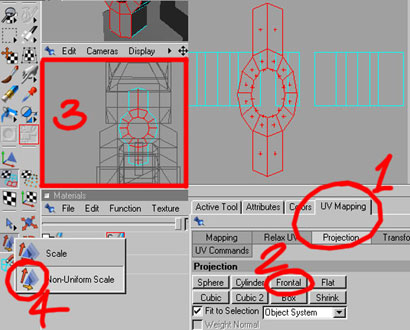
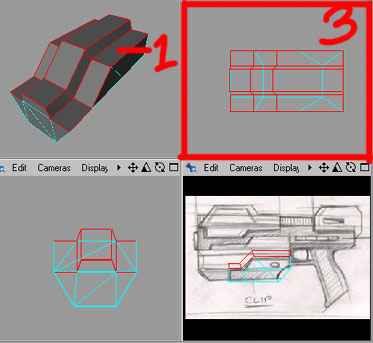
1. Choose UV MAPPING and PROJECTION and 2. Click FRONTAL, BUT before you do make sure 3. the FRONT VIEW is active as marked, Frontal maps from the currently active views' angle even the 3d camera (USEFUL) 4. As you can see its a bit squashed so choose NON-UNIFORM SCALE and stretch it horizontally a bit!
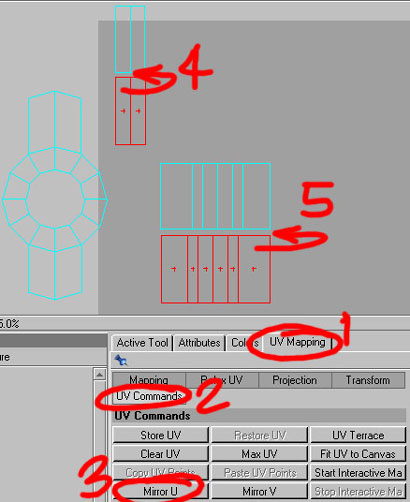
After arranging the top and sides a bit better it seems they are flipped horizontally so 1. Choose UV MAPPING and 2. UV COMMANDS and 3. select the faces and Click MIRROR U to flip them!!
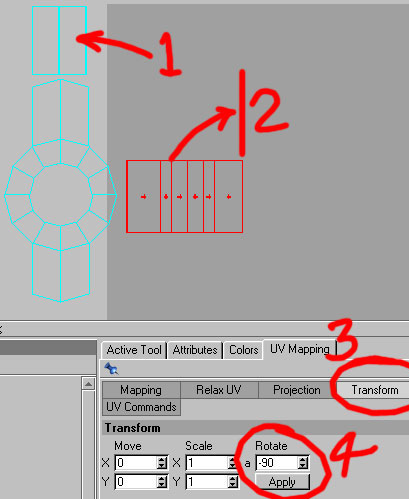
After flipping them to match 1. We move the top over the bottom and 2. the Side over the other side now it needs rotating by 90 degrees so click 3. TRANSFORM and 4. Type -90 degrees and click APPLY...
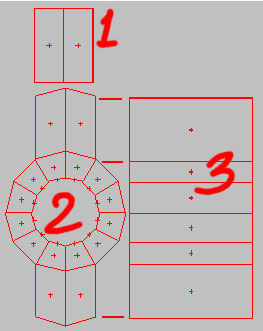
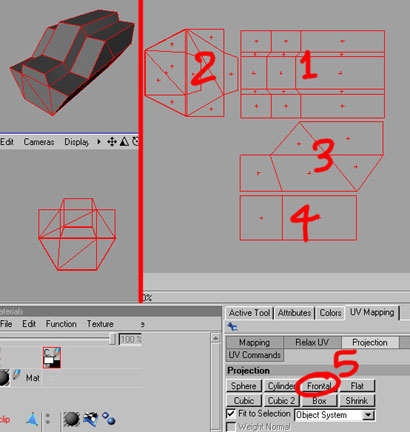
Heres what we end up with 1. Top/bottom view 2. Front view and 3. Sides view. After a bit of arrangment they are all nice and efficient, wasting no space and its obvious which parts are which! This is the basic principle, select and box map, move like parts over their equals (flipping if needed) and use FRONTAL mapping from the appropriate view and the SELECT, MOVE, SCALE tools as well to organize....Easy ;-)
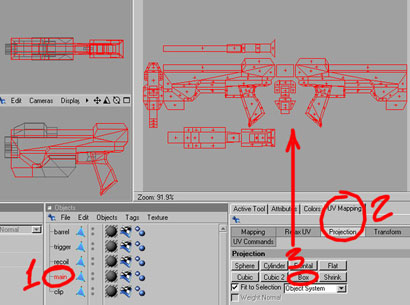
Onto the main part, looks daunting but its the same technique!! Ok 1. Select "main" and select all faces as before and 2. Choose UV MAPPING AND PROJECTION and 3. choose BOX mapping and as you can see it all gets laid out, it always needs a bit of tidying up/organizing so thats what we do next...
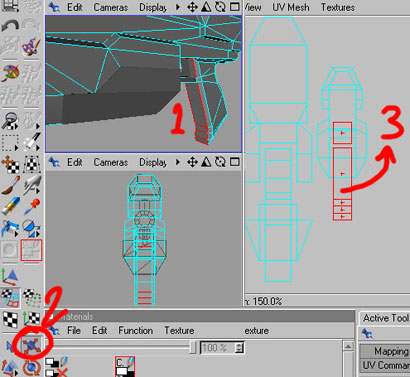
1. Select the back faces (make sure you get em all because some get mixed up in the box mapping) and 2. Choose UV MAPPING and PROJECTION and 3. Make the front/back view active then 4. Click FRONTAL mapping and as you can see the backward facing faces get mapped from the front/back view.
1. As you can see the front faces of the grip are overlapping the front faces of the gun so 2. Select the faces to move and Click the MOVE TOOL and 3. Move em out from under to the side as shown so it gets its own UV space.
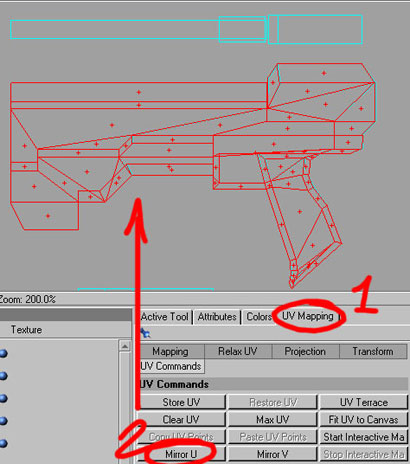
Back to the side UV's and select one side ready for flipping....
1. Click UV MAPPING and UV COMMANDS and 2. Click MIRROR U as before and move it directly over the top of the other side.
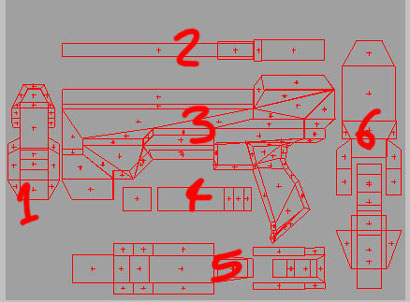
Heres all the UV's after Moving/Scaling/Rotating etc 1. The Front faces 2. Top faces 3. Side faces 4. Front of the grip 5. Bottom faces and 6. the back faces. The back faces are scaled up a bit because in-game you will see the gun mainly from the back/side so they have a bit more UV space! Easy wasn't it? ;-) Box map, Frontal map various bits, move/scale/rotate to lay them out efficiently...
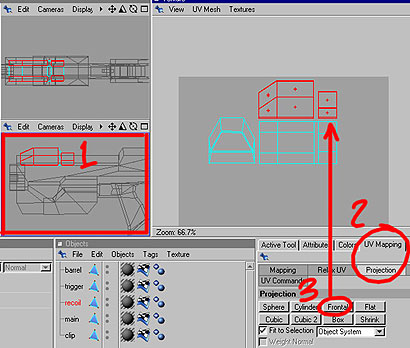
Onto the next part the recoil block thingy on top, 1. Select all forward/backward facing faces 2. As seen here, make sure 3. The front view is Active and 4. Choose UV MAPPING and PROJECTION and 5. Click FRONTAL to map those faces
1. Make the SIDE VIEW Active and select the side faces and again 2. Click UV MAPPING and PROJECTION and 3. FRONTAL map the faces from that view. As you can see they are layed out as well, Front, sides and top/bottom...
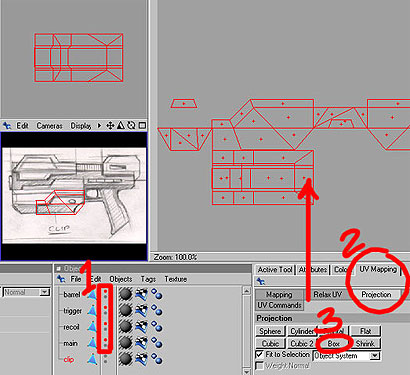
1. For the clip we can hide all the other objects by double-clicking the top dots for each one and this hides them in the viewports, 2. UV mMAPPING and PROJECTION and guess what? 3. BOX mapping!!!
1. Select all the top faces after box mapping, 2. UV MAPPING and PROJECTION, 3. Make the TOP VIEW active and 4. FRONTAL map it from the top view.
Here it is all layed out, 1. Top, 2. front/back, 3. Sides and 4. Bottom face, 5. All done using frontal mapping from the appropriate views!
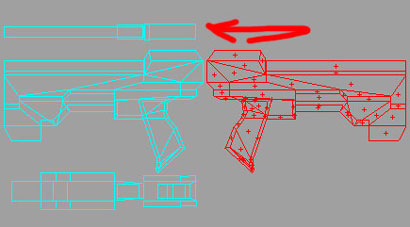
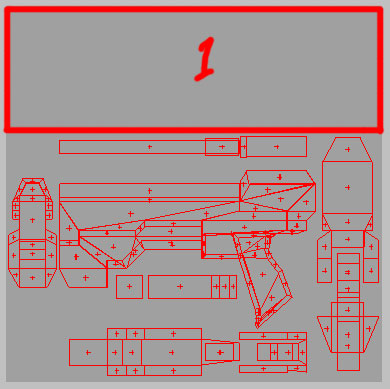
Now we have to put all the UV's in the main UV Space square, Only the UV's of the currently selected object show up though ;-( one solution is to connect all the objects together then they will all show up, but for this one we are using guesswork ;-) basically all the main parts fit in the bottom half leaving 1. This area blank which we place all the other parts in, switching between to make sure none are overlapping!!
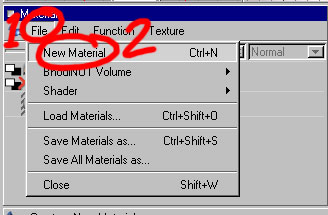
If there is no material click 1. FILE and 2. NEW MATERIAL in the materials tab and this will create a new material, who woulda thought it eh? ;-)
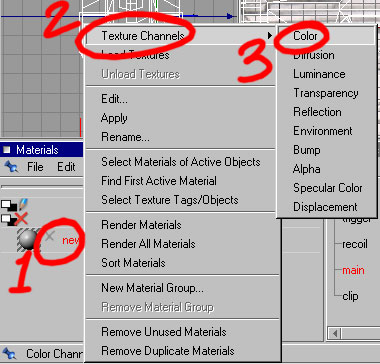
1. RIGHT CLICK and 2. Choose TEXTURE CHANNELS and 3. Choose COLOR...see next stage..
1. Make sure NEW TEXTURE is ticked, 2. Set the width/height in this case 1024x1024 and 3. Pick a base colour! Click OK and you have a new blank base image for the skin.
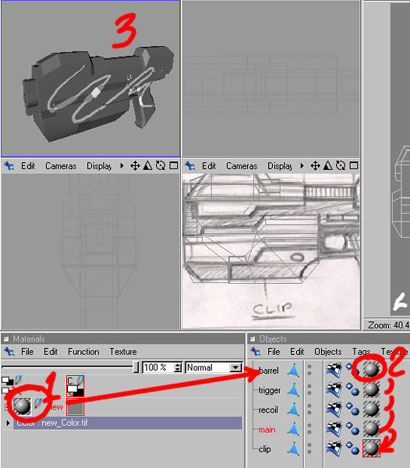
Now we need this material on each object so 1. Drag onto 2. "barrel" then HOLD CTRL and Click and drag this material onto the next one down, etc until they all have the same material, now its time to get painting, part 2 will be online very soon!! Any questions on anything C4D related drop by my Forums in the Cinema 4D section and I'd be happy to help!! Author: Psionic3d.co.uk |
|
| Premium Partners | |||||
Free website templates and paid web templates are great tools to make your websites look perfect! You will save time and money with our flash templates and free website templates
Our visitors are satisfied with the quality of our free and paid website templates! Please visit our free website templates and paid website templates sections. We offer free web templates, free web layouts, free web page templates and other stuff for free download. All templates come with the html and external css file so you may easily edit HTML with your favorite HTML editor. Feel free to download our free web templates for your personal websites. Terms of use depend upon the website template vendor. |
Home | Submit Tutorial | Top Sites | Free Templates | Website templates | Privacy Policy | Contact Us |